Anyone know where I can get a set of seals for rebuilding the water pump in this '78 Wing? I found all of the gaskets and o-rings and oil seal, but it's the pump/water seal that needs replacing... I would take a whole pump too by the way as Honda discontinued them...
Thanks,
Jody
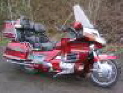
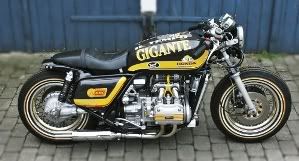
78 GL1000 Water pump
Moderators: Whiskerfish, Forum Moderators
-
jodyone
- Rusty Probie

- Posts: 2
- Joined: Wed May 24, 2006 6:13 pm
- Location: Chicago
-
GL1-242

- Honored Life Member

- Posts: 4022
- Joined: Sun May 07, 2006 12:09 am
- Location: Littleton, Colorado
try and order from another dealer or online. I just ordered a pump from the dealer about 2 week's ago. just had it installed last Sat. I also ordered a K&L waterpump seal kit also, just incase I needed it.
Paul
Paul
84 GL1200 STD
75 GL1000 #202
75 GL1000 (AKA, GL1-242)(AKA, Flipper)
76 LTD
76/77 CB750F
Bultaco's = 121, 152, 167, 188
75 GL1000 #202
75 GL1000 (AKA, GL1-242)(AKA, Flipper)
76 LTD
76/77 CB750F
Bultaco's = 121, 152, 167, 188
-
Bandanna
- Platinum Member

- Posts: 1594
- Joined: Sun Jan 16, 2005 5:34 pm
- Location: n.e. england u.k.
-
AL Smith
- Cast Iron Member

- Posts: 92
- Joined: Sun Feb 27, 2005 1:28 pm
- Location: Seguin,Tx.78155
w-pump kit
Go to a bearing store,you can get any oring or seal you NEED! 
-
octane

- SUPER BIKER!!!!

- Posts: 3763
- Joined: Sat Jun 11, 2005 3:24 pm
- Location: Denmark
Re: 78 GL1000 Water pump
Hi Jodyjodyone wrote:Anyone know where I can get a set of seals for rebuilding the water pump in this '78 Wing? I found all of the gaskets and o-rings and oil seal, but it's the pump/water seal that needs replacing... I would take a whole pump too by the way as Honda discontinued them...
Thanks,
Jody
I'm not quite sure what seal you refere to but I think this article
does mention what you're looking for ?! :
Subject: Rebuilding the unrebuildable FCW waterpump - 1981 GL1100
List of tools needed:
v 8mm socket (1/4? deep well recommended)
v 10mm socket (1/4? deep well recommended)
v 3-inch extension (1/4? recommended)
v Ratchet (1/4? recommended)
v Gasket scraper (preferred, dull screwdriver may be used)
v Pan (for draining oil/radiator fluid)
v Rags and/or speedi-dry
Parts needed:
v (1) Water pump gasket and o-ring set
Ø (1) Front Cover Gasket 11391-371-306
Ø (1) Water Pump Cover Gasket 11396-371-306
Ø (1) Water Pump O-Ring 91356-706-000
Ø (1) Water Pump O-Ring 91305-KT7-003
Ø (2) Front Cover O-Rings 91312-371-013
v (1) Mechanical Seal (from a Honda CX500 Turbo) 19217-657-023
v (1) Mechanical Seal C/R 3952 v (2) Shaft Bearings 6000 2RS
NOTE:
The bearings and one seal (C/R) 3952 are not available from Honda; you can get these from your local bearing distributor. The bearings are fairly common ones and will most likely be on the shelf. The seal on the other hand is not a
common one and may need to be ordered. Every o-ring is available from either the Honda dealer or any auto parts house (if you?re lucky). I would recommend the dealer as the o-rings are metric and not every auto parts house carries a full selection of metric. The following is a recounting of my experiences and yours may be different. The bike has no body panels and due to this I am unaware if it is necessary to remove any body panels to complete this task.
Drain the oil and discard correctly.
Remove faux tank.
Drain the radiator fluid and discard correctly. Empty overflow bottle also.
Remove the bottom radiator hose.
Remove the water pump cap, held on with four 8mm bolts. You do not need to remove the small section held on with two bolts, the section the hose connects to. (If you do remove it, you will need an o-ring not on the list.)
Remove the front engine cover. This is held on with nine bolts with 8mm heads. One located on the top throttle side is recessed whereas all the others are not. This one is easily missed if you are not careful. Also the top couple will
require a thin socket due to interference from the frame cross rail. This is why I recommend a ¼" drive. When the engine cover comes off pay careful attention to the location of o-rings, collars and dowel pins. All of mine stayed put but all came out with just a touch of my fingers.
Remove seal located in the front of the engine, which the water pump shaft slides into. This was not on the original list but mine was oval so I added it.
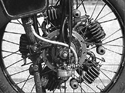
Turn the front engine cover over and remove the three 10mm bolts securing the water pump in. You may need to tap the water pump out from the front. I used a socket and a soft blow hammer. By now it was obvious that the cooling system
had never been flushed as it was home to a major amount of crud and deposits. BTW, so far all of this is covered within the Honda service manual. From here on we go further than the manual suggests.
A small ¾ moon clip on the impeller shaft (located on the backside of the water pump) secures the impeller. Carefully press this off. You don't want to hurt the shaft or the groove for the clip. There is no part number listed for
the clip, as I was unable to find a replacement at any parts house. The available ones were either too large or too small. I reused the clip on mine (not really recommended). A regular outside retaining ring of the correct diameter would suffice. The ears would be in no danger of impacting anything that I could determine. Remove the impeller. You will most likely need to 'assist' it out. Use a soft blow hammer such as a brass one or a plastic no-bounce one. Mine was gunked enough I had to use a drift to drive it completely out. Pay attention as the impeller comes out. There is a collar on
the forward section of the shaft just aft of the impeller blades. Make sure you remember its size.
Now you need to pull the water pump bearings from the water pump. There are two within it. The forward one pulls out towards you and the other is pushed out thru the pump. Use a socket, which just fits within the space. There is another collar between the bearings, again, remember the size. As you press this bearing out you are also pressing out the mechanical seal in the backside of the water pump.
(As you work clean the inside of the covers, the water pump mount area, etc. as well as possible. Clean all mating and gasket surfaces. My oil-bathed areas had a very slight sludge accumulation, next to nothing really. However the water passage areas were nasty. It appeared as if the bike had never had a radiator flush since it was new in 1981.)
On the water pump itself, remove the two o-rings and replace with new ones. Insert the water pump into the front engine cover and secure with the three 10mm bolts.
Insert the new bearings into the water pump. DO NOT forget to place the collar in between these bearings. I inserted the forward bearing, then slide the impeller thru this and slide the collar over the shaft. Then I inserted the rear-most bearing over the shaft into the water pump. In order to make seating the bearings easier I used a lightweight oil (3 in 1 oil). Insert the mechanical seal (larger one, appears to have a spring inside of it) on top of this bearing. Seat the impeller completely and slide the ¾ moon clip in the groove.
Fit new gaskets on the rear of the front engine cover and water pump mounting surface (front of front engine cover). I used a very slight amount of silicon to hold the front engine cover gasket on. If you do this ensure no silicon is overlapping into the inner edges. I let it dry over night and trimmed, as needed the next morning. As I used very small dabs there was nothing to trim.
Replace the old o-rings on the forward area of the engine along with any collars as needed. Should be two upper corners for the water passages, two around collars, and one on the water pump mount area. Insert mechanical seal
into front of engine where water pump shaft inserts.
Slide the front engine cover back onto to engine, being careful to line up dowels. Lightly tap the cover down snug. Insert and snug bolts down finger tight.
Replace the lower radiator hose back upon the radiator. Insert the water inlet portion of the water pump cover into the radiator hose and swivel the water pump cover into place against the front engine cover. Insert and finger tighten the bolts, which secure the cover.
Look around and ensure you have no left over parts. If no left over parts are found (which is what we hope happens!), then tighten the bolts. Once again the upper throttle side bolts require the use of a thin drive (1/4" works great) socket. I personally tighten every other one around the cover in gradual steps to prevent warping.
Fill system with 50/50 mix of anti-freeze/water and look for leaks. If none are found start the motor and monitor the flow, adding mixture as needed. If you are changing to something like Evans NPG, follow the instructions included with the Evans fluid. Once the system appears to be topped off, fill the overflow tank as needed, cap it and the radiator. Replace the faux tank and go for a ride. Check periodically for leaks and ensure the overflow bottle level is between the minimum and maximum level marks. Enjoy!
Total time should be less than one hour. (Bike with no extra bodywork needing removed.)
Recommendations:
Use a piece of cardboard as a template to hold the bolts as both the water pump cover and the front engine cover are held on with several different sizes. This will save you some time and worry when it comes time to replace everything.
Have plenty of rags and/or speedi-dry on hand, as no matter how well you drain the bike, there is more oil and water inside waiting for you!
Take your time. If there is sludge within the oil-bathed areas, consider a motor flush afterwards. Inspect the sludge for metal particles.
The article is about a 1100 but I'm quite sure
that the parts mentioned are the same for the 1000.Someone please correct me if I'm wrong.
Hope this helps
and a warm WELCOME to you !
Octane
Da' Supercharged Bulldog
"A designer knows he has achieved perfection
not when there is nothing left to add
but when there is nothing left to take away"
Antoine de Saint-Exupery
"A designer knows he has achieved perfection
not when there is nothing left to add
but when there is nothing left to take away"
Antoine de Saint-Exupery
-
Frenchy

- True Blue Steel Biker

- Posts: 2850
- Joined: Sat Jan 22, 2005 12:15 am
- My Album: http://www.ngwclub.com/gallery/v/wingmans/frenchy1
- Location: Prescott Valley, AZ
- Contact:
Not to blow my own horn, but I've got what you need right here: http://www.crescentmoonunlimited.com/ht ... ssion.html
Frenchy
-
octane
- SUPER BIKER!!!!
- Posts: 3763
- Joined: Sat Jun 11, 2005 3:24 pm
- Location: Denmark
Just to clear up.
Jody PM'ed me:
What he was looking for was the:
v (1) Mechanical Seal (from a Honda CX500 Turbo) 19217-657-023

witch IS still available from Honda, even though it is not on the
GL parts-list, as for the GL you can only order a complete pump,
of witch this is a part.
The writer I quoted above, just happend to find out
that it is, in fact, available from the 'CX500 turbo' partslist,
in effect making it possible to rebuild the "unrebuildable" GL pump.
Octane
Jody PM'ed me:
What he was looking for was the:
v (1) Mechanical Seal (from a Honda CX500 Turbo) 19217-657-023
witch IS still available from Honda, even though it is not on the
GL parts-list, as for the GL you can only order a complete pump,
of witch this is a part.
The writer I quoted above, just happend to find out
that it is, in fact, available from the 'CX500 turbo' partslist,
in effect making it possible to rebuild the "unrebuildable" GL pump.
Octane
Da' Supercharged Bulldog
"A designer knows he has achieved perfection
not when there is nothing left to add
but when there is nothing left to take away"
Antoine de Saint-Exupery
"A designer knows he has achieved perfection
not when there is nothing left to add
but when there is nothing left to take away"
Antoine de Saint-Exupery
-
Sidecar Bob

- Honored Life Member
- Posts: 8118
- Joined: Sun Jun 11, 2006 10:14 pm
- Location: Kawartha Lakes, Ontario
I don't know about the CX-turbo models, but the Honda Transverse Twins crowd (CX/GL500/650) are mostly using a Yamaha mechanical seal these days.
The information is here: http://www.elsham.pwp.blueyonder.co.uk/cx500/
The information is here: http://www.elsham.pwp.blueyonder.co.uk/cx500/
Mr. Honda ('83 GL1100/Dnepr) summer How a motorcycle evolves thread
The Famous Eccles ('84 CX650EI/VeloUral) winter Never Ending Build (CX500forum)
Click: Colour schematics for all GL1000 & GL1100 and GL1200 standard models plus instructions on how to download the full size version
"A guy with two sidecars can't be all bad." - Cookie
Another guy with two sidecars..... Hmmmm... must be something to that....
-
taunusrainer
- Silver Member

- Posts: 942
- Joined: Wed Oct 04, 2006 2:57 pm
Hi Gents,
I am happy to let You know that my rebuild kits are back in stock after a long time.
They are for bakelite impeller pumps and include the expensive mechanical seal!!!
My ebay seller name is goldwingnews and here is the current offer:
http://cgi.ebay.com/ebaymotors/ws/eBayI ... 0557704908
DON'T DISCARD YOUR OLD PUMPS!!!
CU
Ray
Last edited by taunusrainer on Fri Sep 10, 2010 4:06 am, edited 1 time in total.
1976 GL1000 test mule
1977 GL1000 in parts, rebuild in progress
1969 Ford 17m 2.3V6
1976 Ford Cortina 2.3V6 (Propane)
1990 Mustang 5.0 7up conv.
1998 Peugeot 406 Coupe (Propane)
1977 GL1000 in parts, rebuild in progress
1969 Ford 17m 2.3V6
1976 Ford Cortina 2.3V6 (Propane)
1990 Mustang 5.0 7up conv.
1998 Peugeot 406 Coupe (Propane)
-
Frenchy
- True Blue Steel Biker
- Posts: 2850
- Joined: Sat Jan 22, 2005 12:15 am
- My Album: http://www.ngwclub.com/gallery/v/wingmans/frenchy1
- Location: Prescott Valley, AZ
- Contact:
-
taunusrainer
- Silver Member
- Posts: 942
- Joined: Wed Oct 04, 2006 2:57 pm
Re: 78 GL1000 Water pump
Frenchy, I agree, there is a minor risk of destroying the pump during the rebuild process, but most of the guys here have considerable skills and will surely do it right.
1976 GL1000 test mule
1977 GL1000 in parts, rebuild in progress
1969 Ford 17m 2.3V6
1976 Ford Cortina 2.3V6 (Propane)
1990 Mustang 5.0 7up conv.
1998 Peugeot 406 Coupe (Propane)
1977 GL1000 in parts, rebuild in progress
1969 Ford 17m 2.3V6
1976 Ford Cortina 2.3V6 (Propane)
1990 Mustang 5.0 7up conv.
1998 Peugeot 406 Coupe (Propane)