Pics at last!

A forum for stories, pics and updates of your resto's. Be it a barn find, Grampas hand me down or a bike being brought back to it's former glory.If you are restoring it, show us your stuff!

Moderators: Brant, Sagebrush, Forum Moderators

Post Reply
User avatar
Old Fogey
Honored Life Member
Honored Life Member
Posts: 7782
Joined: Mon Aug 27, 2007 11:31 pm
Location: Glasgow, Scotland
Contact:

#361

Post by Old Fogey »

Feels like a million year since I last posted on here!

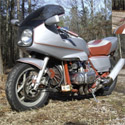
Well, there have been a few developments that were documented in other places such as the conversion to the full GL1200 hydraulic clutch.
See here; http://www.ngwclub.com/forum/viewtopic.php?t=22248
That took a little while after I got back from the US with the knowledge that it was feasible. As luck would have it, there was one on eBay sitting waiting for me!

I also had a couple of other ideas while I was rooting around in Cyborg's shop, one of which was the fitting of an oil pressure gauge.
Not a new idea as such, as I had already got a gauge off Sunnbobb some time back, but a new way of doing it.
Sunnbobb's gauge had a black face which I felt didn't fit in with the white dials I had spent considerable time doing, and also was mechanical which was going to make it difficult to fit where I wanted it.

Anyway, I found this nice white faced electronic gauge for not a lot of money from a dealer in Scotland! http://www.mcgillmotorsports.co.uk/
(This is one of the nice guys in the motor trade; very helpful, very fast and cheap!)


The gauge.

Image


The complete kit. Ignore the crinkled ring! I had already started to take it off at this point.

Image


Two dismantled gauges!

Image


Finished job! Looks as though it was meant to be there.

Image


The gauge is very much deeper than the old fuel gauge which means some pretty drastic surgery inside the shelter. The old gauge bracket has to be cut off and a new deeper one fabricated and the front shelter housing cross member needs a chunk taken out of it. Where the cuts were made I've folded the edges over to give it back some strength and it seems rigid enough.


The sender is huge! Initially I was going to put in the same place as the OEM pressure switch but........


Image


although it cleared everything, just, I realised that removing the carbs would be next to impossible without removing the switch as well.

Image


So this was the solution. An 1/8" NTP to 18x1.5 mm adapter screwed in to the oil gallery at the back of the engine and the gauge fitted to that.


Image


Not a lot of clearance for the brake pedal but enough.

Image


The LED light in the gauge was blinding! So I used a 7v regulator from a GL1100, wired into the lighting circuit, to reduce the volts and the brilliance. I did it this way so that it the gauge was only lit when the lights were on; a bit pointless as I always have the lights on!


Image


Image


So there we go. Another of my little fancies come to fruition :-D

Ah, but 'wot abaht de fool gage' I hear you ask!

Funny you should ask that.......................!!
Last edited by Old Fogey on Mon Dec 14, 2009 1:46 am, edited 1 time in total.
"Impossible Is Just a Level of Difficulty!..."
If I'd wanted you to understand, I would have explained it better! (Johann Cruyff)
I’d give my right arm to be ambidextrous! :-D
User avatar
Roady
Member Relations &_Graphics
Posts: 11957
Joined: Wed Jun 20, 2007 2:35 pm
Location: Port St. John, FL

#362

Post by Roady »

That's just beautiful. Nice work and the sender mounting is very nice too.

What about that fuel gauge?
User avatar
sunnbobb
Facebook Admin
Facebook Admin
Posts: 21323
Joined: Thu Jan 10, 2008 4:09 pm
My Album: http://www.ngwclub.com/gallery/v/wingmans/sunnbobb/
Location: LaConner, WA

#363

Post by sunnbobb »

Slick, and great pictures. I am also glad you figured out that adapter into the block. I have been looking at that as a place to tap in, but never was able to figure out the right size for the adapter. Where did you find it?

Again, great job!
I found the end of the internet

---- Bradshaw Bikes custom polishing for your wing. Visit us on facebook!

1978 Learning Experience
1980 County Road Hauler "Brain Damage"
1978 Cafe Custom Gl1000 "Vyper"
1977 Bulldog Inspired "Vaincre"
1981 Street Fighter GL1100 "No Quarter"
1983 Supercharged Street Drag "Anubis" (in worx)
1983 gl1100 mint restoration "Kristen"
1985 Aspencade..pondering.
User avatar
CYBORG
Moderator
Moderator
Posts: 24979
Joined: Mon Jan 14, 2008 12:52 pm
Location: Muskegon mich

#364

Post by CYBORG »

very nice. but ya. what about the fuel gage?
1978 custom GL1000
1977 custom with 1200 engine
1985 gl1200
User avatar
Old Fogey
Honored Life Member
Honored Life Member
Posts: 7782
Joined: Mon Aug 27, 2007 11:31 pm
Location: Glasgow, Scotland
Contact:

#365

Post by Old Fogey »

sunnbobb wrote:Slick, and great pictures. I am also glad you figured out that adapter into the block. I have been looking at that as a place to tap in, but never was able to figure out the right size for the adapter. Where did you find it?

Again, great job!
Thanks for all the positive comments tumb2

Adapter found here after MUCH searching!
https://www.europaspares.com/INSTRUMENT ... _2007.html

This was also where I found the oil pressure fuel pump switch I mentioned before. But it has a 1/4" NPT male thread. The thread on the block for the OEM switch is 10mm. This is almost the same as 1/8" NPT . Try finding an adapter to do that in either thread! I've had no luck so far, so that idea is on hold.
There is the possibility I'll dump the breather can and utilise the gallery plug at the top of the block (above the new sender) with the same size adapter to take the switch there.

As for the fuel gauge, well............... you're just going to have to be patient. What I thought was going to be a simple job is turning out to be not so! Again!b :roll:
"Impossible Is Just a Level of Difficulty!..."
If I'd wanted you to understand, I would have explained it better! (Johann Cruyff)
I’d give my right arm to be ambidextrous! :-D
User avatar
CYBORG
Moderator
Moderator
Posts: 24979
Joined: Mon Jan 14, 2008 12:52 pm
Location: Muskegon mich

#366

Post by CYBORG »

we will be waiting and watching. i have a fuel gauge problem of my own. actually the sending unit on the double tank 1200 project. any ideas?
1978 custom GL1000
1977 custom with 1200 engine
1985 gl1200
User avatar
Neil
Moderator
Moderator
Posts: 5683
Joined: Tue Sep 09, 2008 3:34 pm
Location: Davenport, Florida

#367

Post by Neil »

Looks very nice John, good write up as usual.
User avatar
Old Fogey
Honored Life Member
Honored Life Member
Posts: 7782
Joined: Mon Aug 27, 2007 11:31 pm
Location: Glasgow, Scotland
Contact:

#368

Post by Old Fogey »

CYBORG wrote:we will be waiting and watching. i have a fuel gauge problem of my own. actually the sending unit on the double tank 1200 project. any ideas?
Doug, you're just trying to give me sleepless nights! :lol: :lol:

Seriously, that will take some real thought!

Need more info.

I'm guessing you still have the underseat tank, heavily modified, and the tail tank.

I'm assuming that the seat tank is sealed and the tail tank feeds it.

Where is the entry point in the seat tank for the top tank feed?

Do you have a sender or any provision for one in either tank.

What is the capacity of each tank ?

Where is the outlet to the carbs?

If you can do it, pics would be good or even a line drawing diagram.

Got to tell you, at this point nothing springs to mind.

Hmmmm, no, wait.
Not sure how but if there were two senders, one in each tank linked through a relay so that the underseat tank sender only became operative when the top tank sender indicated empty........that would work but would require more thought to set up.
"Impossible Is Just a Level of Difficulty!..."
If I'd wanted you to understand, I would have explained it better! (Johann Cruyff)
I’d give my right arm to be ambidextrous! :-D
User avatar
CYBORG
Moderator
Moderator
Posts: 24979
Joined: Mon Jan 14, 2008 12:52 pm
Location: Muskegon mich

#369

Post by CYBORG »

no need for a sensor in the upper tank. and the lower tank pick up is in the normal place. just no room for the normal sending unit. tanks are tied together as one. one shut off. one reserve. one normal. float on a pivioting arm will not work, because of space. answer: some sort of float that runs up and down. i'm leaning t'ward a row of eletronic sensors that are located at positions of full. half, reserve, and empty. triggering colored lights on the dash. any idea where i can find sensors that will work in fuel, that will be eather open or closed depending on its contact with the fuel
1978 custom GL1000
1977 custom with 1200 engine
1985 gl1200
User avatar
Hoosier Daddy
True Blue Steel Biker
Posts: 2910
Joined: Thu May 21, 2009 9:12 pm
Location: N.E. Indiana (Kendallville)

#370

Post by Hoosier Daddy »

What about a fuel cell sending unit LIKE THIS ?
Stewart Warner / Autometer, and GM have different resistance from full to empty so it depends on the gauge ohms used... Also is 8" too long? There is also an 11" and I am sure others avaiable elsewhere...
Bulldoged '81 GL1100 "BOMBER!" BUILD THREAD
Bratstyle '80 GS750L "OVERKILL"
Cafe'd '81 CB750C "ROCK-IT"
Basket Case '72 CB450 K5 "NO CLASS"
Resto-Mod '67 BSA Spitfire "STAY CLEAN"

rainstromrider say's I'm "addicted to the build"... I think he might onto something :)
User avatar
Old Fogey
Honored Life Member
Honored Life Member
Posts: 7782
Joined: Mon Aug 27, 2007 11:31 pm
Location: Glasgow, Scotland
Contact:

#371

Post by Old Fogey »

I guess they work with a float running up the tube? I think you will still need two senders. If you only have one in the bottom tank when the top tank is 3/4 empty the gauge would still show full or if there was only one in the top tank, when it was empty it would show empty even though the bottom tank had fuel.
These could work with a sender in each tank, the one in the top tank lights up the full and halfway bulbs, the bottom one the reserve and empty.
Would there would be enough room to get them in like that, Doug?
"Impossible Is Just a Level of Difficulty!..."
If I'd wanted you to understand, I would have explained it better! (Johann Cruyff)
I’d give my right arm to be ambidextrous! :-D
User avatar
CYBORG
Moderator
Moderator
Posts: 24979
Joined: Mon Jan 14, 2008 12:52 pm
Location: Muskegon mich

#372

Post by CYBORG »

thanks hoosier daddy thats exaxtly what i need. old fogey. each tank holds about 3 gal. and i really like a gauge better then the lights. this unit will mount in the lower tank. it will show full until the lower tank starts to go down. at that point i should have about 120 miles left. i guess in reality the gauge would really be starting at half and going to empty. i can live with that. the top tank is completly exposed, and a sending unit would not fit into the lines of the tank. thank to both of you for your interest, and your solutions
1978 custom GL1000
1977 custom with 1200 engine
1985 gl1200
User avatar
Old Fogey
Honored Life Member
Honored Life Member
Posts: 7782
Joined: Mon Aug 27, 2007 11:31 pm
Location: Glasgow, Scotland
Contact:

#373

Post by Old Fogey »

Ah, yes! The fuel gauge question.

Well, I guess it's a good idea to have one, though whether what I've fitted is any more accurate than the original I have my doubts.

The GL1100 gauges seemed to be the best bet, nice and simple; straight swap it looked like.

Yeah, well; if I'd used the whole kit and caboodle from the 1100 it would have been, other than a couple of minor things plus the wiring. But seeing as I had a lot of hours and work in my 1000 ones I wanted to use them.
Of course, needless to say, the 1000 gauges do NOT interchange with the 1100 ones.

The mounting bracket is different and the mounting points on the instruments are different too.

The 1100 bracket will mount to the 1000 forks but either the tube for the ignition switch in the light panel needs to be cut away or the bracket mounting holes have to be elongated slightly so that the panel sits over the switch (we are talking moving the bracket forward about something like 1/16" ).

On top of that most of the wiring is different colours with different plugs. I'm still working on that; got most of it but got a dead short somewhere in the signals circuit and no oil light! Great fun!

If you want to fit the 1000 instruments you will need to do this;


Image


Image


Using the 1100 bracket as a base, the other part is cut from the 1000 and welded to the back of it. The long bits that hold the top of the light panel have to be seriously narrowed to get the 1000 instruments in.
The choke bracket and stud was pressed out of the 1000 bracket and fitted to the 1100 one with a small weld to hold it.

I had further work to do on the fuel and temp gauges. The 1100 ones are black with white letters. Mine of course are the other way round!


Image


The gauge face was removed, scanned in black and white, inverted so that I now had it done with a white face. this was printed off on photo paper and the coloured sections added. The finished thing was cut out and glued over the original face, then it was sprayed with lacquer to prevent it discolouring with damp. Hopefully that will work out.
The needles were also redone in black with red tips.
Must say I'm quite pleased with the result.


Good job you can't see the wiring at this time!

Image


This is the finished set-up with the 1100 idiot lights and gauges along with the 1000 instruments. I have covered the not needed temp gauge in the rev counter with a (needed)clock. Not wildly happy with the look of that but it will do for the moment.
As you might imagine, the plastic wiring cover at the back has to come in for some serious surgery to make it fit. Not got a pic of that.


Image


Pretty blue lights!
I've tried to make the markings more visible by putting very small holes in the dials at the critical points. I must get some brighter bulbs.


Image


Too bright!
The oil pressure light is still too bright even though it is running on just 7 volts. Must do something about it. Anyone got any 'not-so-bright' ideas? :lol:


Image
"Impossible Is Just a Level of Difficulty!..."
If I'd wanted you to understand, I would have explained it better! (Johann Cruyff)
I’d give my right arm to be ambidextrous! :-D
User avatar
Roady
Member Relations &_Graphics
Posts: 11957
Joined: Wed Jun 20, 2007 2:35 pm
Location: Port St. John, FL

#374

Post by Roady »

Very slick. I like the blue lights and tiny dots. Very classy.

You sure do nice work.
User avatar
Cookie
Honored Life Member
Honored Life Member
Posts: 15821
Joined: Thu Oct 25, 2007 11:37 pm
RIP: 1950-2011
Location: San Mateo, CA

#375

Post by Cookie »

On the dual tank you could use one gauge and two senders with a toggle like a truck.
Enjoy life,
Cookie


A guy with two sidecars can't be all bad.
Owner of 4.4 76s and one lone 75 Wings (does a spare engine make .2?)
Post Reply

Return to “Members Restorations and Projects”