If you have not had your carbs out yet this is a basic picture/drawing of what you are facing for the cables.
1. Make your bike safe for Maintenance. I recommend using the centerstand for this procedure as you will need access to both sides and the top.
2. Fuel petcock off
3. Disconnect the fuel line. I usually do this at the output of the pump for the easiest access.
4. Open the top shelter cover, remove tool tray then both side covers and their respective retention knobs (use caution not to loose the threaded washers for the retention knobs). Remove air Filter cover then Air filter.
5. Using a 10mm socket on a long extension locate 2 bolts that secure the Air filter housing to the Carb plenum and remove same.
6. Remove the engine vent lines from Air Filter housing. On the 78/79 there are 2 hoses located on the back left side of the housing. On the 75-77 there is one hose attached to the back right side of the housing. Yes they are a pain in the butt!
7. Now lift housing up and out. Tilting it forward seems to help some but if you go too far it will jam. It takes some wiggling. Make sure the get the square gasket that sits between the carb plenum and the filter housing.
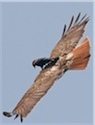
8. Now you should be able to see the top of the carbs and the cables etc. Take notice of the cable routing. Follow the cables forward along the left side of the shelter housing. Here you will see the pull cable tension adjuster

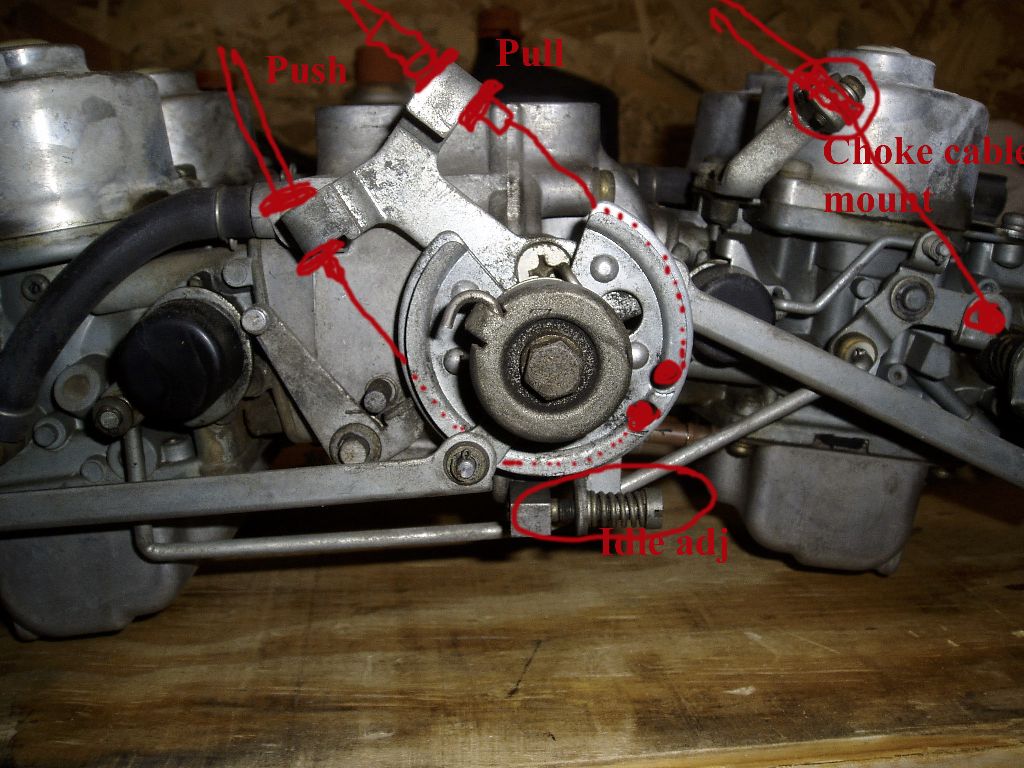
9. This often requires a soaking with some penetrate if it has not been worked in a while. Using a 10mm and a 8mm (I think) for the barrel loosen the locknut then screw the barrel in putting some slack in the pull cable. You should be able to monitor your progress by giving gentle twists to the throttle and observing the amount of free-play in the grip. You want as much as you can get to assist with removing and installing the cables on the carb bellcrank.
10. Remove the spark plug wires and stow as far forward as you can.
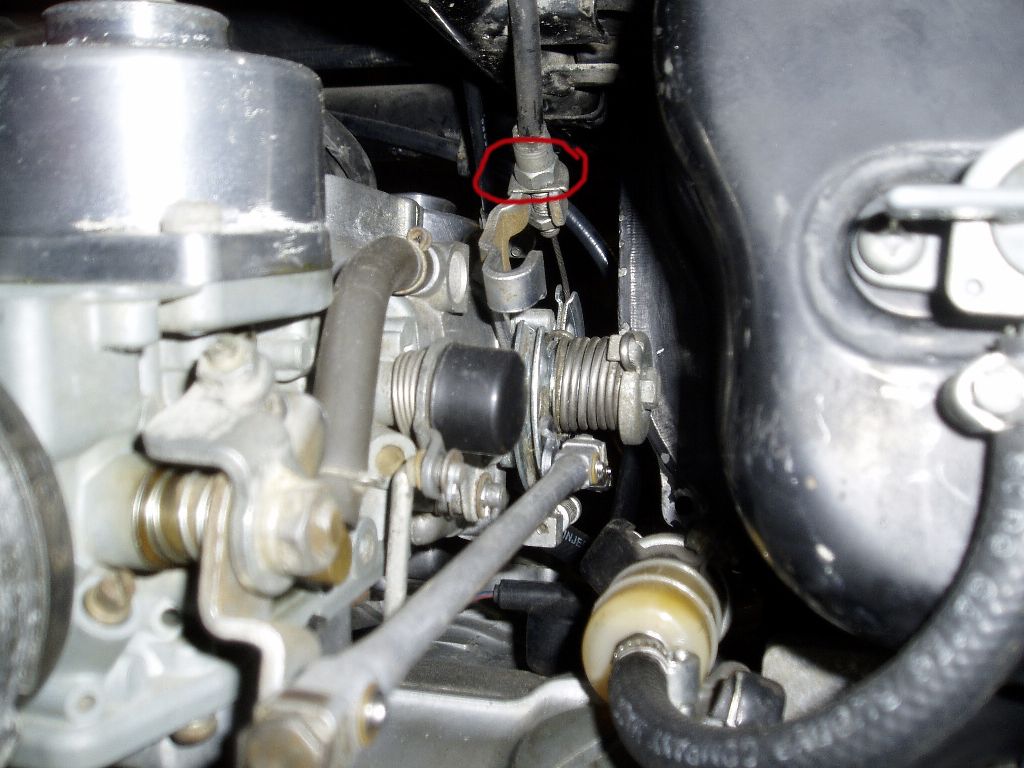
11. At this point many folks go straight to the cables but I prefer to get the carbs loose first. It gives a small amount of wiggle room for the wrenches later on. Remove the 8 Acorn bolts that secure the intake runners to the heads. Disconnect the Choke Cable from the right side using a # 2 JIS (Japanese Industrial Standard) Screwdriver. (Hint) just get the screw loose enough to get the cable out from under the hold down. Then with your left hand rotate the Choke mechanism up toward the cable and disconnect the end of the cable.

12. Now slide the carbs slightly left and back. They will only move a small amount. Using a JIS screwdriver remove the Air Cut off Valve. Ensure to remove the 2 lower screws and not the screws that hold the valve together

13. Place the screws for the valve in a safe location and make sure to get the 2 small O Rings that go between the valve and the Carb Plenum.

14. Slide the carbs slightly forward. I usually start with the push cable. Using 2 10mm open-ended wrenches loosen the lock nut and get the cable free of the Bell-crank support. I do this with one hand going in the left side and the other going in from the shelter cover access. When the cable is free of te support push the cable housing down a bit to create some slack at the bottom of the bell-crank. Now move over to the right side of the bike and using a 90 degree pick (a bent nail and a pair of pliers works fine) get between the cable and the bell-crank and bring the slack up to the point where the cable swedge is in the bell-crank. Rotate the cable to 90 degrees and then slide the swedge out the side of the hole. Repeat this process for the top (pull) cable.

15. Ensure to pay attention to the placement of the washers and especially the formed washers as they engage the bell-crank cable support. There are several different variations on the market. Now again noting the routing of the cables for reinstallation pull them up through the shelter cover access and lay them out of the way.
16. Here is a tip I will borrow from Randakk's tips. If you value the finish on your valve covers then now is the time to protect them. Duct tape will do a nice job on the left hand head valve covers.
17. The Carbs will come out the left hand side at this point but will require a fair amount of wiggling. To make the job easier slide the rack left and going through the shelter access remove the inboard screw on the # 1 CV Cap then slide the rack to the right and remove the outboard screw and remove the cap and slide and spring. Now the rack should exit the left side of the bike with minimal wiggling. After removal ensure to verify that all 4 intake to head O Rings are accounted for.