here's what I came up with, by searching the parts book.

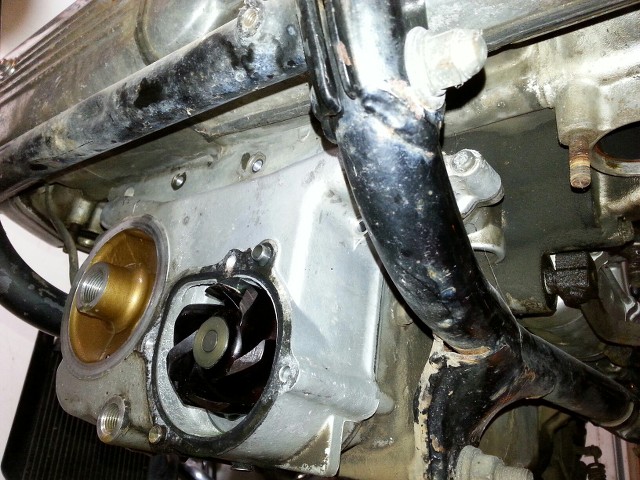
O-ring (red arrow) 13 x 2.5mm (for "Plug, Oil Tube". #12 on chart)
That must be it. Measurements fit, and right next to it
there's one of the other o-rings from the set; #50, yellow arrow.
The set was called 'engine front end gasket set' or something similar.
...though I have yet to find that "Plug, Oil Tube" on the engine.