Pedro!'s rebuilding projects

A forum for stories, pics and updates of your resto's. Be it a barn find, Grampas hand me down or a bike being brought back to it's former glory.If you are restoring it, show us your stuff!

Moderators: Brant, Sagebrush, Forum Moderators

Post Reply
User avatar
Wolfie666
Chrome Member
Chrome Member
Posts: 131
Joined: Mon Aug 05, 2013 1:45 pm
Location: Bridgeville PA 15017

Re: Pedro!'s rebuilding projects

#1651

Post by Wolfie666 »

just caught this and read all of it today.
Liking the tank you are making for the 1500.
I just finished a simi naked 1500, but don't like the tank cover I made, so following with interest on yours!
20180803_074344.jpg
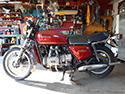
20180803_074344.jpg (83.64 KiB) Viewed 519 times
.
Don't take life seriously,
You will never get out alive!
.
User avatar
Pedrotq
Gold Member
Gold Member
Posts: 1072
Joined: Tue Dec 03, 2013 3:04 am
Location: Perth, Western Australia

Re: Pedro!'s rebuilding projects

#1652

Post by Pedrotq »

Yeah, making a silk purse out of a sows ear is not the easiest thing to accomplish.

The 75 to 77 tank sides look good on the 1500 but I find that the handlebars interfere with them. I am thinking of cutting the top of the air filter box down to allow me to lower the 75 side tank side covers, then making brackets to suite.

Once done I will be making templates for them all so anyone can do similar, but I have several projects going at the same time, at the moment I am getting the 75 as close to ready to register and ride, but as usual Dollar$ are always the anchor.

Been messing around with the wiring putting diodes in where needed for LED usage, relays rather than running high current through the hand controls and I did short the yellow wires for the headlight switch but I recon it might overcharge the battery when the headlights are not on, so I re-routed it to a relay between the fuel tank and rear mudguard just under the seat.

Happy and Safe Riding to Everyone, Peter.
Attachments
Wiring city, replacing many crimp on terminals.
101_0955.JPG (307.72 KiB) Viewed 508 times
Pedrotq ~ (Pedro The Questionable)

Perth, Western Australia.

1988 GL-1500 ~ HRD sidecar outfit.
1990 GL-1500SE ~ (project) ~ Stripped down to be a "Naked 90".
User avatar
Patriccio
Silver Member
Silver Member
Posts: 984
Joined: Thu Mar 07, 2013 3:57 pm
Location: San Diego, Ca.

Re: Pedro!'s rebuilding projects

#1653

Post by Patriccio »

I have a question for Mr Questionable: What function do the O rings on the plug wires serve?
If there is one thing I have learned throughout this process it is this: Check your respirator for spiders before you put it on.
User avatar
Pedrotq
Gold Member
Gold Member
Posts: 1072
Joined: Tue Dec 03, 2013 3:04 am
Location: Perth, Western Australia

Re: Pedro!'s rebuilding projects

#1654

Post by Pedrotq »

In answer to your question Mr Patriccio,

here are the original GL-1500 spark plug lead with a coil, as you can see there is a rubber grommet on the spark plug wire, I am not sure if it is vulcanised to the wire or not?

There is a chamfer in the coil outlets and inside the coil caps along with a chamfered plastic wad piece.

The reason is to waterproof the coils as they do get wet, also they stop the wire coming out with vibration.

Well that's my reckoning of the situation :-D :-D :-D :-D :-D
Attachments
101_0956.JPG
101_0956.JPG (308.06 KiB) Viewed 473 times
Pedrotq ~ (Pedro The Questionable)

Perth, Western Australia.

1988 GL-1500 ~ HRD sidecar outfit.
1990 GL-1500SE ~ (project) ~ Stripped down to be a "Naked 90".
User avatar
Pedrotq
Gold Member
Gold Member
Posts: 1072
Joined: Tue Dec 03, 2013 3:04 am
Location: Perth, Western Australia

Re: Pedro!'s rebuilding projects

#1655

Post by Pedrotq »

Ongoing with the 75 (#1 project), I sandblasted the radiator grille and gave it the rattle-can treatment.

I also have stripped the wiring harness for the 76 outfit as there is a little problem, the voltage regulator plug has semi-melted between the Yellow (alternator output) and the Green (earth) wires ............ Not good :-? Just maybe this is what is making her run like ....... Er? terrible! :lol:

I will be changing out the voltage regulator and replacing the melted plug.
Attachments
Sandblasted and Rattle-Can treated radiator grille.
101_0958.JPG (218.41 KiB) Viewed 473 times
A gutless 76 outfit.
101_0960.JPG (299.8 KiB) Viewed 473 times
The other side with the wiring harness apart.
101_0961.JPG (304.08 KiB) Viewed 473 times
The Naughty (melted) plug.
101_0962.JPG (200.91 KiB) Viewed 473 times
Pedrotq ~ (Pedro The Questionable)

Perth, Western Australia.

1988 GL-1500 ~ HRD sidecar outfit.
1990 GL-1500SE ~ (project) ~ Stripped down to be a "Naked 90".
User avatar
Pedrotq
Gold Member
Gold Member
Posts: 1072
Joined: Tue Dec 03, 2013 3:04 am
Location: Perth, Western Australia

Re: Pedro!'s rebuilding projects

#1656

Post by Pedrotq »

Fitted new timing belts to the 75 and torqued up the cam shaft drive wheels.
Attachments
Ready for a "Belting"
101_0959.JPG (289.96 KiB) Viewed 473 times
Belted and torqued up.
101_0963.JPG (326.12 KiB) Viewed 473 times
Pedrotq ~ (Pedro The Questionable)

Perth, Western Australia.

1988 GL-1500 ~ HRD sidecar outfit.
1990 GL-1500SE ~ (project) ~ Stripped down to be a "Naked 90".
User avatar
Pedrotq
Gold Member
Gold Member
Posts: 1072
Joined: Tue Dec 03, 2013 3:04 am
Location: Perth, Western Australia

Re: Pedro!'s rebuilding projects

#1657

Post by Pedrotq »

Fitted my re-cored radiator ($750au worth :shock: ) it has cooling fins continuously across the radiator and has off-set tubes (thus the expense).

New thermostat, hoses and clamps. The radiator painted flange plates are stone chipped and require a paint job, but that's another day (or year).

Tomorrow I am hoping to;

Connect the hand controls to the main harness.
Fit the air cleaner box and filter.
Cut the spark plug leads to length, fit the caps and plugs.
Fit the Faux tank frame.
Fit all the electrics into the faux tank frame.
Fit the radiator coolant overflow bottle and hosing.
Another coat of black on the radiator grille.
Take Dixie for Walkies.
Wash the dishes.
Cook tea.
Argue with the MOW.
Relax.

Busy day! dancr

Happy and safe riding to All, Peter.
Attachments
Re-Cored radiator.
Re-Cored radiator.
101_0964.JPG (270.12 KiB) Viewed 472 times
As you can see the fins cross the radiator completely (more cooling effect) and the coolant tubes are offset.
101_0965.JPG (350.4 KiB) Viewed 472 times
Fan bolted in place.
101_0968.JPG (243.48 KiB) Viewed 472 times
Thermostat housing in place with the new thermostat hidden within.
101_0970.JPG (232.76 KiB) Viewed 472 times
All done except for the radiator grille which will get another coat of black before fitting.
101_0971.JPG (303.22 KiB) Viewed 472 times
Pedrotq ~ (Pedro The Questionable)

Perth, Western Australia.

1988 GL-1500 ~ HRD sidecar outfit.
1990 GL-1500SE ~ (project) ~ Stripped down to be a "Naked 90".
User avatar
Pedrotq
Gold Member
Gold Member
Posts: 1072
Joined: Tue Dec 03, 2013 3:04 am
Location: Perth, Western Australia

Re: Pedro!'s rebuilding projects

#1658

Post by Pedrotq »

G'day to Everyone! :-D

I managed to get all but one thing done today, didn't manage to argue with the MOW (yet) :lol:

Assembled the radiator overflow tank with a new "O" ring and lid seal that I made a couple of years back.

Fitted new spark plug end caps, numbers and a sleeve for the support clips, Its a real shame but you need to grind the raised NKG logo on the plug caps otherwise they wont fit and seal in the original plug covers.

She is starting to take shape again dancr
Attachments
Components of the radiator overflow bottle cap.
101_0972.JPG (409.02 KiB) Viewed 458 times
New goodies.
New goodies.
101_0973.JPG (294.69 KiB) Viewed 458 times
Pity about the grinding work required.
101_0974.JPG (347.08 KiB) Viewed 458 times
Getting there  :-)
Getting there :-)
101_0975.JPG (353.73 KiB) Viewed 458 times
Got a bit shakey with the camera (and I am sober).
101_0976.JPG (247.74 KiB) Viewed 458 times
Pedrotq ~ (Pedro The Questionable)

Perth, Western Australia.

1988 GL-1500 ~ HRD sidecar outfit.
1990 GL-1500SE ~ (project) ~ Stripped down to be a "Naked 90".
User avatar
Pedrotq
Gold Member
Gold Member
Posts: 1072
Joined: Tue Dec 03, 2013 3:04 am
Location: Perth, Western Australia

Re: Pedro!'s rebuilding projects

#1659

Post by Pedrotq »

Next is to finish the brakes off, I fitted new SS pistons all around along with the kits, so its fit the brake pads and shims, tighten all bolts and bleed them all (including the clutch).

Happy and safe riding to everyone, peter.
Attachments
The remainding front brake parts to be fitted.
101_0977.JPG (321.57 KiB) Viewed 458 times
Pedrotq ~ (Pedro The Questionable)

Perth, Western Australia.

1988 GL-1500 ~ HRD sidecar outfit.
1990 GL-1500SE ~ (project) ~ Stripped down to be a "Naked 90".
User avatar
sunnbobb
Facebook Admin
Facebook Admin
Posts: 21272
Joined: Thu Jan 10, 2008 4:09 pm
My Album: http://www.ngwclub.com/gallery/v/wingmans/sunnbobb/
Location: LaConner, WA

Re: Pedro!'s rebuilding projects

#1660

Post by sunnbobb »

Home stretch
I found the end of the internet

---- Bradshaw Bikes custom polishing for your wing. Visit us on facebook!

1978 Learning Experience
1980 County Road Hauler "Brain Damage"
1978 Cafe Custom Gl1000 "Vyper"
1977 Bulldog Inspired "Vaincre"
1981 Street Fighter GL1100 "No Quarter"
1983 Supercharged Street Drag "Anubis" (in worx)
1983 gl1100 mint restoration "Kristen"
1985 Aspencade..pondering.
User avatar
Pedrotq
Gold Member
Gold Member
Posts: 1072
Joined: Tue Dec 03, 2013 3:04 am
Location: Perth, Western Australia

Re: Pedro!'s rebuilding projects

#1661

Post by Pedrotq »

G'day All :-D

Spent the past couple of days messing with little things like fitting brake pads, bleeding the system, checking all bolts are torqued up, made a custom brake line for the rear brake, checked wiring, fitted a relay for the horn as one day (soon) I will probably fit air horns.

Made a list of SS nuts bolts and washers to finish her off, but that's next break.

Happy and Safe Riding to Everyone. Peter.
Attachments
as she looks now.
as she looks now.
101_0978.JPG (282.8 KiB) Viewed 414 times
101_0979.JPG
101_0979.JPG (323.35 KiB) Viewed 414 times
101_0980.JPG
101_0980.JPG (312.05 KiB) Viewed 414 times
101_0981.JPG
101_0981.JPG (285.33 KiB) Viewed 414 times
Pedrotq ~ (Pedro The Questionable)

Perth, Western Australia.

1988 GL-1500 ~ HRD sidecar outfit.
1990 GL-1500SE ~ (project) ~ Stripped down to be a "Naked 90".
User avatar
5speed
Honored Life Member
Honored Life Member
Posts: 5315
Joined: Sat Jul 11, 2015 2:37 pm
Location: Nova Scotia Canada

Re: Pedro!'s rebuilding projects

#1662

Post by 5speed »

nice cell phone collection Peter. :)
1982 1100 standard. (sold)
1986 Yamaha FJ1200
2000 Yamaha Roadstar
1976 GoldWing. running but not on the road
1978 Goldwing. future cafe project.
2019 Can-Am ryker (boss's new ride)

2002 Shadow American Classic(sold)
1983 Shadow 500. (sold)
User avatar
Easter
SUPER BIKER!!!!
SUPER BIKER!!!!
Posts: 3000
Joined: Thu Sep 13, 2012 11:33 am
Location: South of Houston 100 miles

Re: Pedro!'s rebuilding projects

#1663

Post by Easter »

5speed wrote:nice cell phone collection Peter. :)
:shock:
Bikes at present:

83 XL 600r with a 2004 XR650L engine
And a slightly worse for the wear BMW GS adventure bike awaiting repair
83 GL in process :IDTS:
User avatar
Rat
Photo Gallery Admin
Photo Gallery Admin
Posts: 15482
Joined: Fri Oct 21, 2005 9:59 pm
My Album: https://www.ngwclub.com/gallery/v/wingmans/rat/
RIP: cookie
Location: Toronto .... Canada

Re: Pedro!'s rebuilding projects

#1664

Post by Rat »

Top left .... second picture ....

Gord
"I'd rather Ride than Shine"
‘14 KLR650 ... not a rat ... yet
‘84 GL1200i ‘R2B6' (Rat to Be 6, the last, adopted by twowings)
My Original 'RAT' was a hybrid '82 CB900/1100F
User avatar
Pedrotq
Gold Member
Gold Member
Posts: 1072
Joined: Tue Dec 03, 2013 3:04 am
Location: Perth, Western Australia

Re: Pedro!'s rebuilding projects

#1665

Post by Pedrotq »

G'day to Everyone! :-D

Yeah, I paid for all them mobiles, they don't get in the way or collect dust, but everyone notices them :lol:

so I spent all week re-wiring the 76 outfit with many modifications, run out of harness tape, more on order from e-Bay.

did a few more things to the 75 and I went to fit the front mudguard and it doesn't fit! :shock: :-? :x

75 mudguard on a 78 front end, the lower support arms interfere with the brake calliper. ...... Easy just swap and turn the forks around so the callipers are in the front.

Just have to make a couple of brackets for the mudguard support arms to attach to.


Happy and safe riding to everyone, Peter.
Attachments
Things don't fit.
Things don't fit.
101_0983.JPG (260 KiB) Viewed 339 times
Pull the front forks off and swap them over.
101_0984.JPG (243.21 KiB) Viewed 339 times
And you get this.
And you get this.
101_0985.JPG (271.01 KiB) Viewed 339 times
Pedrotq ~ (Pedro The Questionable)

Perth, Western Australia.

1988 GL-1500 ~ HRD sidecar outfit.
1990 GL-1500SE ~ (project) ~ Stripped down to be a "Naked 90".
Post Reply
  • Similar Topics
    Replies
    Views
    Last post

Return to “Members Restorations and Projects”