Head Job
Moderator: Whiskerfish
-
hmratbam

- Honored Life Member

- Posts: 4979
- Joined: Wed Sep 20, 2006 8:49 pm
- Location: Battle Mtn NV
YUP!
Proud member of the NGW Cartel
My Album
Jesus is Lord ! Hope is not a plan
83 Ascempade has become a trike with 1200 fork tubes and Maxda Miata rear suspension.
84 Standard ongoing project
82 Interstate 35k reincarnated as a "Street Tracker"
My Album
Jesus is Lord ! Hope is not a plan
83 Ascempade has become a trike with 1200 fork tubes and Maxda Miata rear suspension.
84 Standard ongoing project
82 Interstate 35k reincarnated as a "Street Tracker"
-
hoganJr

- Gold Member

- Posts: 1093
- Joined: Mon Jun 25, 2007 9:18 am
- Location: Greenfield Indiana
why rotate?
I do not ask every question that comes to mind and I now have a Service Manual that answers alot of the questions I've been asking, maybe I can give this forum a break, but why do I need to rotate the crank 90 degrees? If I mark and record the position of the crank and cams and reassemble everything back in place what good does it do to rotate the crank? I am certainly not doubting your wisdom or that of the Service Manual; I must be missing an important detail.
DR
DR
1991 GL1500
-
RebelRouser

- Webmaster (Retired)
")
- Posts: 7198
- Joined: Sat Sep 17, 2005 8:44 pm
- My Album: http://www.ngwclub.com/gallery/v/wingmans/rebelrouser/
- Location: The Dalles, Or.
- Contact:
Re: why rotate?
OK, Really Simple ... If You Bring Your Motor Up To TOP DEAD CENTER As You Should (makes putting it all back together so much easier), Then Your #1 Piston Is All The Way Up In The Cylinder And Your Cams Are Under Pressure From The Valve Springs And The Rockers. And If You Take The Belt Off The Motor The Cam Will Slap Back To A Resting Position. If Your Motor Is At TDC Then Your Valves And Piston Will Collide And Can Be Damaged, Or Destroyed. By Rotating The Crank 90 Degrees You Have Pulled All Four Of The Pistons Into The Motor And There Is All The Clearance In The World Between Your Valves And Your Pistons, No Damage. Hope This Helps, Bud.hoganJr wrote:I do not ask every question that comes to mind and I now have a Service Manual that answers alot of the questions I've been asking, maybe I can give this forum a break, but why do I need to rotate the crank 90 degrees? If I mark and record the position of the crank and cams and reassemble everything back in place what good does it do to rotate the crank? I am certainly not doubting your wisdom or that of the Service Manual; I must be missing an important detail.
DR
If You Didn't Build It, Customize It, And/Or Modify It, Then It Truly Isn't Yours. Rebel Rouser
-
hoganJr
- Gold Member
- Posts: 1093
- Joined: Mon Jun 25, 2007 9:18 am
- Location: Greenfield Indiana
thanks for your patience
what I hear you saying is to rotate the crank 90 while the heads are off and as you reassemble, then before you reinstall the belts turn the crank 270 degrees (plus another full rotation?) and install the belts with the crank pulley arrows lined up on the marks.
DR
DR
1991 GL1500
-
RebelRouser
- Webmaster (Retired)
- Posts: 7198
- Joined: Sat Sep 17, 2005 8:44 pm
- My Album: http://www.ngwclub.com/gallery/v/wingmans/rebelrouser/
- Location: The Dalles, Or.
- Contact:
Re: thanks for your patience
Nah ... Just Turn Your Crank Back To TOP Dead Center And Then Install Your Belts. And Yes, With All The Marks In Their Corresponding Spots, Rotate The Motor A Couple Of Times To Verify The Alignment Of Your Belts And Pulleys.hoganJr wrote:what I hear you saying is to rotate the crank 90 while the heads are off and as you reassemble, then before you reinstall the belts turn the crank 270 degrees (plus another full rotation?) and install the belts with the crank pulley arrows lined up on the marks.
DR
If You Didn't Build It, Customize It, And/Or Modify It, Then It Truly Isn't Yours. Rebel Rouser
-
RebelRouser
- Webmaster (Retired)
- Posts: 7198
- Joined: Sat Sep 17, 2005 8:44 pm
- My Album: http://www.ngwclub.com/gallery/v/wingmans/rebelrouser/
- Location: The Dalles, Or.
- Contact:
Disclaimer: Do Not Attempt This If You Have Limited Mechanical Knowlege And Skill, Hire A Mechanic. My Steps Work Best For Me And They May Not Work Well For Others. This Forum And I Are Not Responsible For And Damages You Might Incur If You Attempt This Job Without The Proper Knowledge And The Proper Literature.
Time To Finish This ... Or Sort Of.
Finally Got The Seals And Gaskets. It's Time To Finish The Head Job.
Left Cam Seals, Pulley And New Timing Belts Installed. Rotated Motor Twice And The Timing Marks All Lined Up.

Installed The Water Pipes, New Orings, Water Jackets, New Gaskets And New Allen Head Bolts.

Installed Carbs, Throttle Cables, Choke Cable, Fuel Lines, Air Box And Chrome Trim Work.

Installed A New Gel Battery.

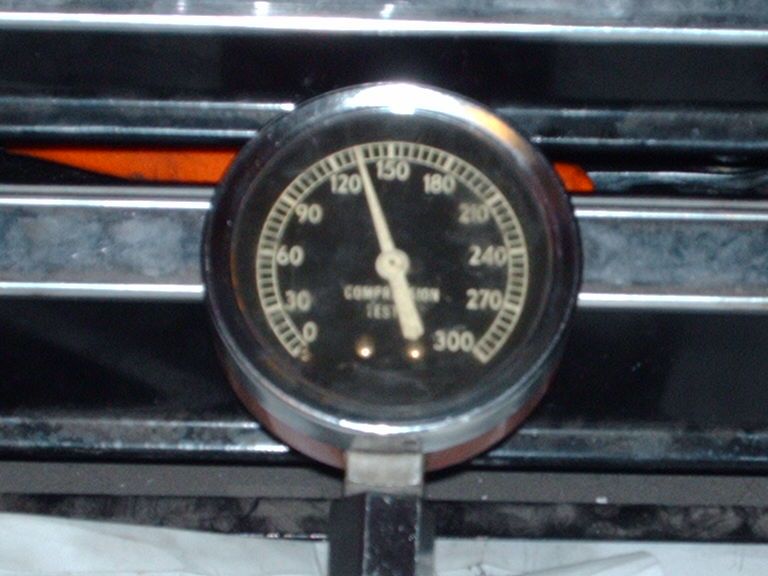
Rechecked And Adjusted The Valves To Be .004 in. Then Did A Basic Dry Compression Test When It Was All Together And Got A 135 PSI Average. Started This Job With A 90 PSI Average. After Filling The Oil I Got A 155 PSI Average Across The Board. This Is Scary. Scary Good.
Installed The Electronic Ignition And Static Timed The Motor.

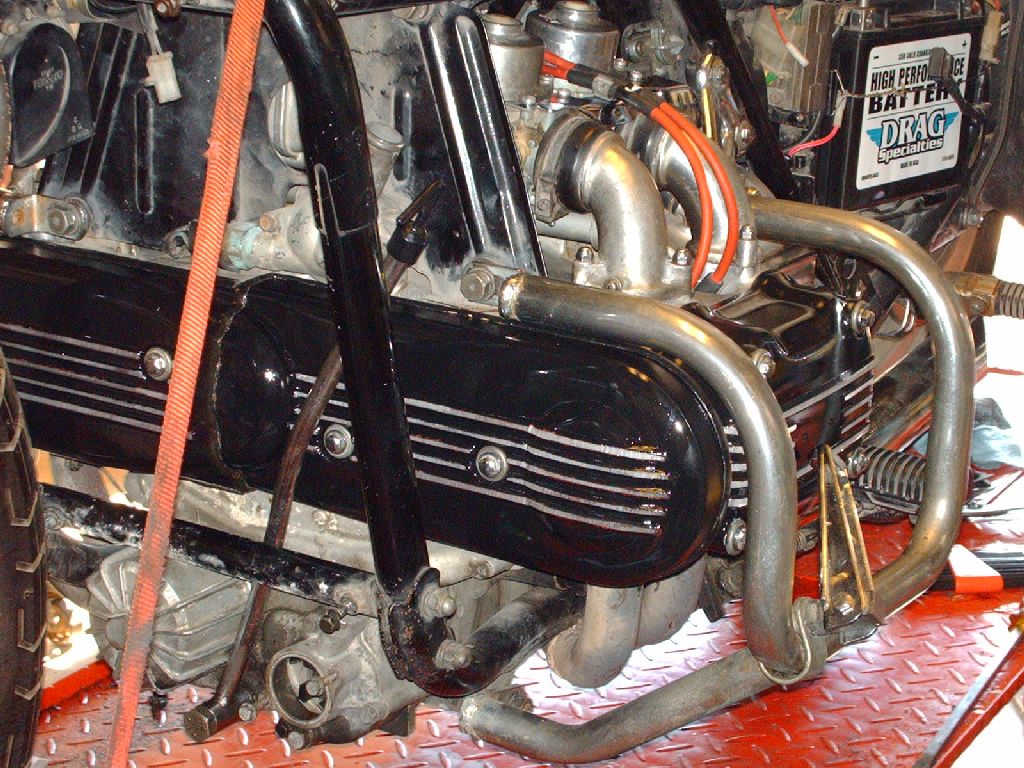
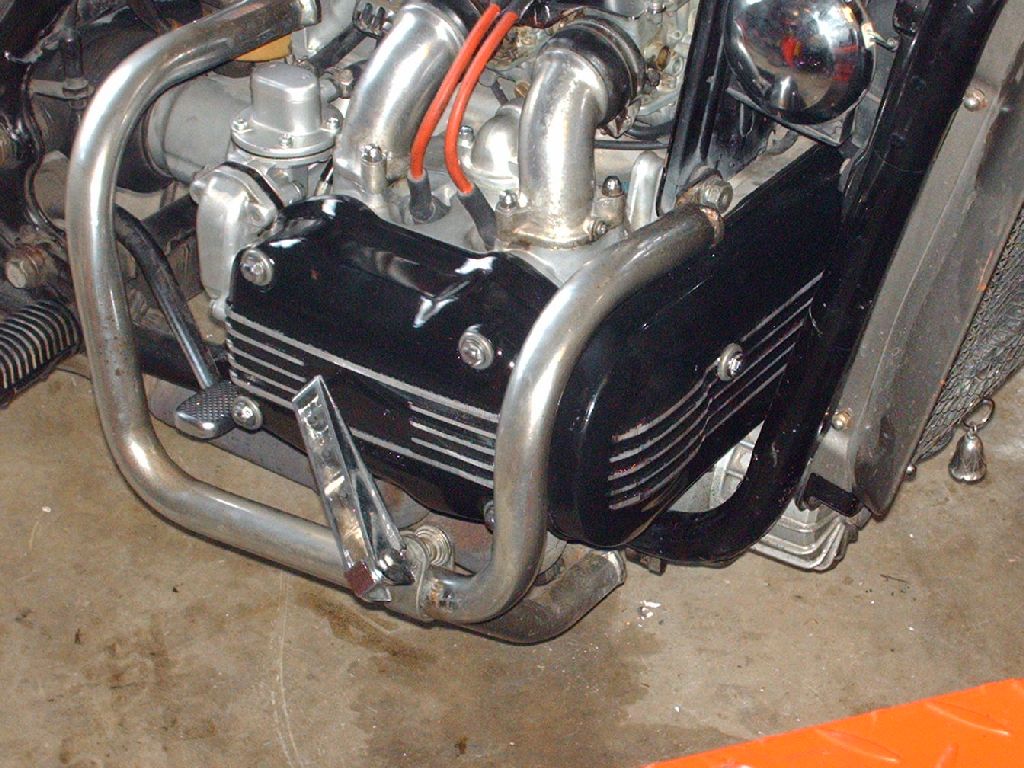
Fired The Bike Up And She Purrs Like A Kitten. Installed The Covers And Radiator And Took Her Off The Table. Will Time Her Tomorrow With The Timing Gun And Sync The Carbs. Then Will Fill The Radiator.

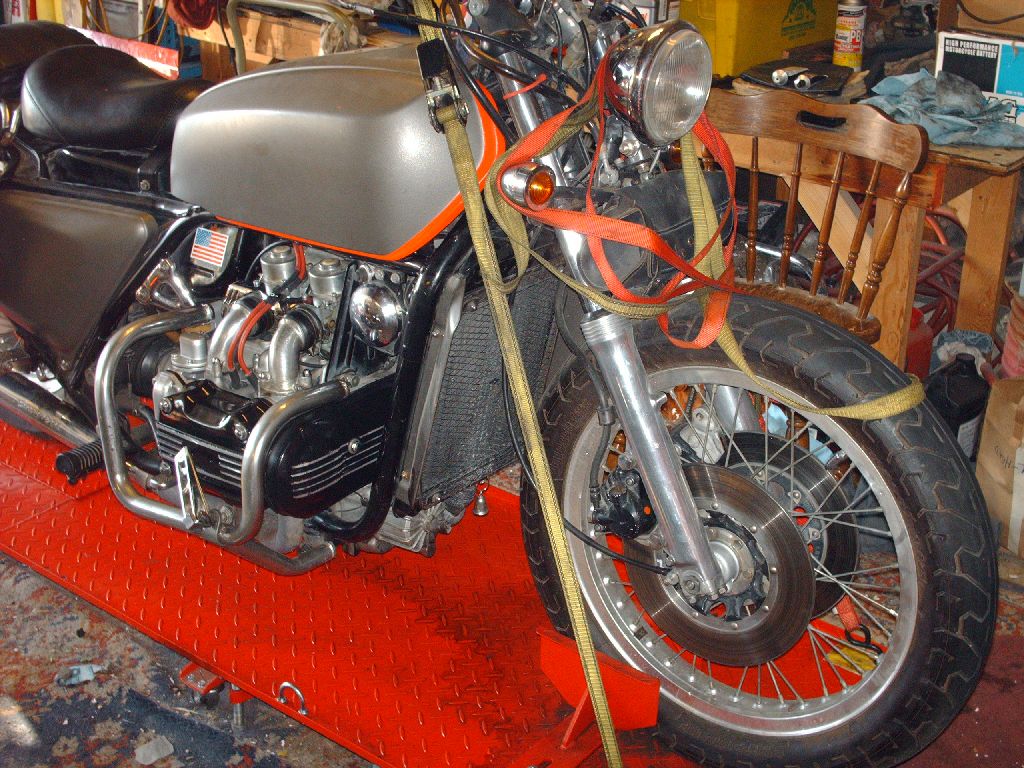


Also On A Side Note, The Reason It Took Some Time Was It Was Time For A Change.

(Pics Can Be Viewed Here: https://ngwclub.com/gallery3/index.php/ ... 7/album212)
Final Steps To Come.
Disclaimer: Do Not Attempt This If You Have Limited Mechanical Knowlege And Skill, Hire A Mechanic. My Steps Work Best For Me And They May Not Work Well For Others. This Forum And I Are Not Responsible For And Damages You Might Incur If You Attempt This Job Without The Proper Knowledge And The Proper Literature.
Time To Finish This ... Or Sort Of.
Finally Got The Seals And Gaskets. It's Time To Finish The Head Job.
Left Cam Seals, Pulley And New Timing Belts Installed. Rotated Motor Twice And The Timing Marks All Lined Up.
Installed The Water Pipes, New Orings, Water Jackets, New Gaskets And New Allen Head Bolts.
Installed Carbs, Throttle Cables, Choke Cable, Fuel Lines, Air Box And Chrome Trim Work.
Installed A New Gel Battery.
Rechecked And Adjusted The Valves To Be .004 in. Then Did A Basic Dry Compression Test When It Was All Together And Got A 135 PSI Average. Started This Job With A 90 PSI Average. After Filling The Oil I Got A 155 PSI Average Across The Board. This Is Scary. Scary Good.
Installed The Electronic Ignition And Static Timed The Motor.
Fired The Bike Up And She Purrs Like A Kitten. Installed The Covers And Radiator And Took Her Off The Table. Will Time Her Tomorrow With The Timing Gun And Sync The Carbs. Then Will Fill The Radiator.
Also On A Side Note, The Reason It Took Some Time Was It Was Time For A Change.
(Pics Can Be Viewed Here: https://ngwclub.com/gallery3/index.php/ ... 7/album212)
Final Steps To Come.
Disclaimer: Do Not Attempt This If You Have Limited Mechanical Knowlege And Skill, Hire A Mechanic. My Steps Work Best For Me And They May Not Work Well For Others. This Forum And I Are Not Responsible For And Damages You Might Incur If You Attempt This Job Without The Proper Knowledge And The Proper Literature.
If You Didn't Build It, Customize It, And/Or Modify It, Then It Truly Isn't Yours. Rebel Rouser
-
dwayne0714

- Brass Member

- Posts: 32
- Joined: Tue Sep 11, 2007 12:40 pm
- Location: Amelia, Ohio
great thread
This a great thread for the new guys like me, Thanks for your time involved in posting this thread.
1983 Honda Goldwing GL1100
-
RebelRouser
- Webmaster (Retired)
- Posts: 7198
- Joined: Sat Sep 17, 2005 8:44 pm
- My Album: http://www.ngwclub.com/gallery/v/wingmans/rebelrouser/
- Location: The Dalles, Or.
- Contact:
Re: great thread
Not A Problem... Thats Why We Are Here....dwayne0714 wrote:This a great thread for the new guys like me, Thanks for your time involved in posting this thread.
If You Didn't Build It, Customize It, And/Or Modify It, Then It Truly Isn't Yours. Rebel Rouser
-
Old Fogey

- Honored Life Member
- Posts: 7704
- Joined: Mon Aug 27, 2007 11:31 pm
- Location: Glasgow, Scotland
- Contact:
Head Job
I'm sure someone will know the answer.
I was told by a Honda technician that the OEM valves have a very thin coating of Stellite on the seat surfaces and that because of this they shouldn't be ground in. Don't know the truth of this.
I was told by a Honda technician that the OEM valves have a very thin coating of Stellite on the seat surfaces and that because of this they shouldn't be ground in. Don't know the truth of this.
"Impossible Is Just a Level of Difficulty!..."
If I'd wanted you to understand, I would have explained it better! (Johann Cruyff)
I’d give my right arm to be ambidextrous!
If I'd wanted you to understand, I would have explained it better! (Johann Cruyff)
I’d give my right arm to be ambidextrous!
-
octane

- SUPER BIKER!!!!

- Posts: 3763
- Joined: Sat Jun 11, 2005 3:24 pm
- Location: Denmark
Re: Head Job
He is right;Old Fogey wrote:.....
I was told by a Honda technician that the OEM valves have a very thin coating of Stellite on the seat surfaces and that because of this they shouldn't be ground in.....
the valves can not be 'ground'
but they can be 'lapped', which is what Rebel has done (I think)
even though he calls it both lapping and 'grinding'.
Da' Supercharged Bulldog

"A designer knows he has achieved perfection
not when there is nothing left to add
but when there is nothing left to take away"
Antoine de Saint-Exupery
"A designer knows he has achieved perfection
not when there is nothing left to add
but when there is nothing left to take away"
Antoine de Saint-Exupery
-
RebelRouser
- Webmaster (Retired)
- Posts: 7198
- Joined: Sat Sep 17, 2005 8:44 pm
- My Album: http://www.ngwclub.com/gallery/v/wingmans/rebelrouser/
- Location: The Dalles, Or.
- Contact:
Re: Head Job
OK, Technically You Guys Are Correct ... Lapped ... Not Ground.octane wrote:He is right;Old Fogey wrote:.....
I was told by a Honda technician that the OEM valves have a very thin coating of Stellite on the seat surfaces and that because of this they shouldn't be ground in.....
the valves can not be 'ground'
but they can be 'lapped', which is what Rebel has done (I think)
even though he calls it both lapping and 'grinding'.
If You Didn't Build It, Customize It, And/Or Modify It, Then It Truly Isn't Yours. Rebel Rouser
-
RebelRouser
- Webmaster (Retired)
- Posts: 7198
- Joined: Sat Sep 17, 2005 8:44 pm
- My Album: http://www.ngwclub.com/gallery/v/wingmans/rebelrouser/
- Location: The Dalles, Or.
- Contact:
Well I Finaly Got Some Free Time For The '76 Bober, Timed, Tuned And Synced And Took Her For A Test Ride Last Night And Scared The Crap Out Of Myself... More Responsive Than Ever More Pull And A Longer Larger Top End, Can't Wait To Take It To The 1/4 Mile Drag Strip In The Spring And See Just How Good The Numbers Are... Went On A 150 Mile Ride Today Just To Break Her In And Road Test Her Before This Weekends Events... Awsome.... Still Smiling....
Thank You To All That Helped Out Here And To Frenchy And Susan For All The Parts And Tips...
This Now Brings An End To The Head Job.... Any Questions Just Ask....
Thank You To All That Helped Out Here And To Frenchy And Susan For All The Parts And Tips...
This Now Brings An End To The Head Job.... Any Questions Just Ask....
If You Didn't Build It, Customize It, And/Or Modify It, Then It Truly Isn't Yours. Rebel Rouser
-
Frenchy

- True Blue Steel Biker

- Posts: 2850
- Joined: Sat Jan 22, 2005 12:15 am
- My Album: http://www.ngwclub.com/gallery/v/wingmans/frenchy1
- Location: Prescott Valley, AZ
- Contact:
-
toddthreat
- Brass Member
- Posts: 20
- Joined: Fri Oct 19, 2007 2:48 am
- Location: Portland, OR, USA
piston cleaning?
I'm doing a head gasket replacement.
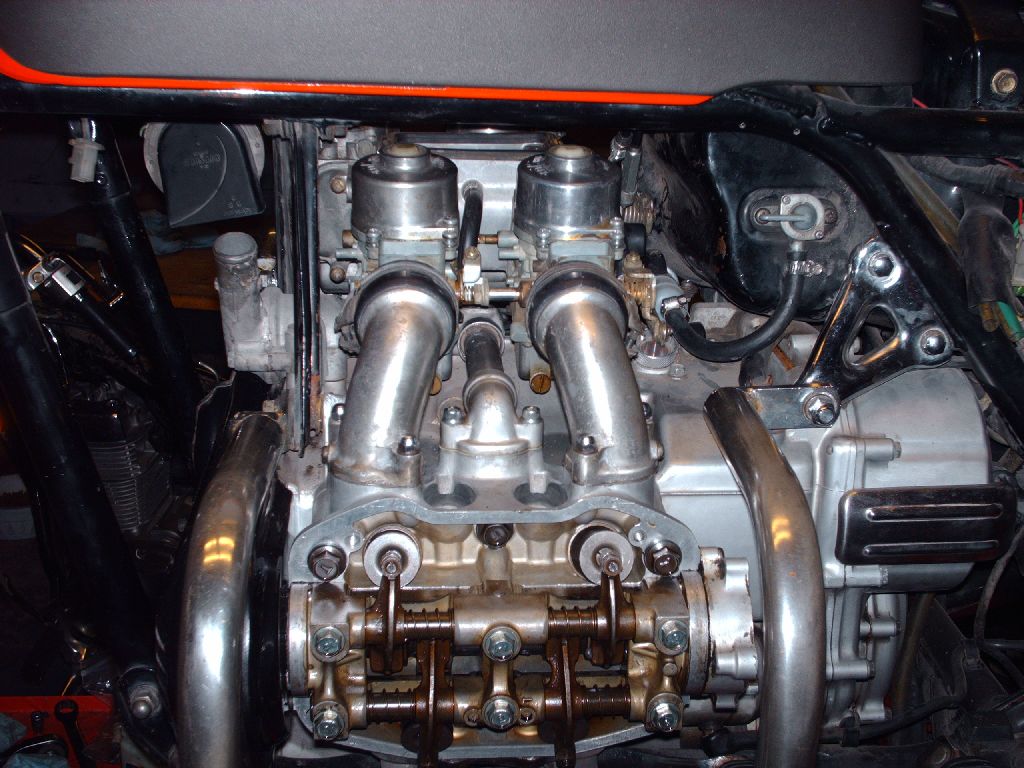
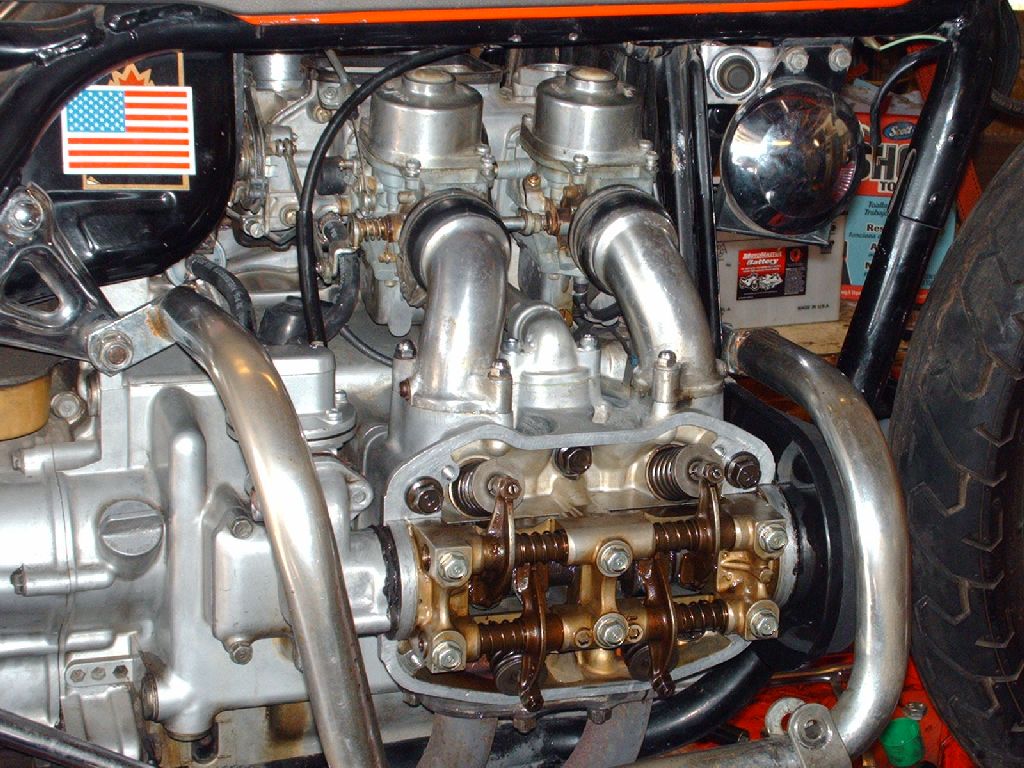
When I put the crank at Top dead center, one piston is all the way out and one is all the way in, but in the photos posted here, they are both recessed.
Do I need to rotate another 360 degrees?
How do you clean the piston ends?
Should I clean the cylinder walls?
Thanks!
When I put the crank at Top dead center, one piston is all the way out and one is all the way in, but in the photos posted here, they are both recessed.
Do I need to rotate another 360 degrees?
How do you clean the piston ends?
Should I clean the cylinder walls?
Thanks!
75 GL1000, love/hate relationship!
-
hmratbam
- Honored Life Member
- Posts: 4979
- Joined: Wed Sep 20, 2006 8:49 pm
- Location: Battle Mtn NV
Todd; To clean or not to clean? If there is a lot of caked on carbon on top the pistons that might loosen and fall off when the engine is restarted,by all means clean it off. If there's only a light coating that is tight,it probably doesn't need to be removed. Removal by scraper or brush weilded very carefully to not damage pistons(aluminum) and walls (cast iron). Cylinder walls should only need to be wiped, maybe a little carb or brake cleaner. be sure to oil lightly before putting the heads back on. At TDC one piston will be full up and one full down,the picture with pistons half way indicated a 90 degree rotation to move both pistons down out of harm's way. When you go back together,go with the instructions as to positions of crank and cam and you should end up on #1 firing. After putting the belts on,turn the engine at least twice very carefully by hand just in case something didn't end up right! Hang in there and proceed with caution and it will come out right! Good Luck!
Ron
Ron
Proud member of the NGW Cartel
My Album
Jesus is Lord ! Hope is not a plan
83 Ascempade has become a trike with 1200 fork tubes and Maxda Miata rear suspension.
84 Standard ongoing project
82 Interstate 35k reincarnated as a "Street Tracker"
My Album
Jesus is Lord ! Hope is not a plan
83 Ascempade has become a trike with 1200 fork tubes and Maxda Miata rear suspension.
84 Standard ongoing project
82 Interstate 35k reincarnated as a "Street Tracker"
-
- Similar Topics
- Replies
- Views
- Last post
-
- 11 Replies
- 747 Views
-
Last post by vmeyer
-
- 9 Replies
- 297 Views
-
Last post by Wingingit2
-
- 69 Replies
- 1941 Views
-
Last post by robin1731
-
- 8 Replies
- 672 Views
-
Last post by Pinball