Harald
Beautiful work into the details for Uschi. On the issue of the clip ons hitting the tank did you consider putting steering stops - just a bolt tapped into the lower tree - in new places to limit the travel of the bars? It will reduce your turning circle for low speed parking manouvers but stop the bars touching the tank.
And you get better at parking!
Cheers
Dean
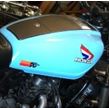
Building a café racer called „Uschi“
Moderators: sunnbobb, Neil, Forum Moderators
-
230Rocket
- Billet Alum. Member

- Posts: 265
- Joined: Wed May 27, 2015 9:49 am
- Location: McKinney, Texas
Re: Building a café racer called „Uschi“
1982 GL1100 Fat Turtle
-
LastMohawk

- Billet Alum. Member
- Posts: 237
- Joined: Fri Jun 07, 2013 7:57 am
- Location: Eifel, Germany
- Contact:
Re: Building a café racer called „Uschi“
Hello Dean,
Yes, I thoght at steering stoppers. My old beemer has reduced stoppers. And you need much place on the road to turn around.
This is why I don't want to reduce the stoppers at the wing.
Greetings
Harald
Yes, I thoght at steering stoppers. My old beemer has reduced stoppers. And you need much place on the road to turn around.
This is why I don't want to reduce the stoppers at the wing.
Greetings
Harald
-
LastMohawk
- Billet Alum. Member
- Posts: 237
- Joined: Fri Jun 07, 2013 7:57 am
- Location: Eifel, Germany
- Contact:
Re: Building a café racer called „Uschi“
Hello everybody,
this week I screwed something on Uschi again. Inspired by an inquiry in the German Goldwing forum on how to repair the fuel pump, I wanted to briefly document the replacement of the membrane. Since I had already renewed a few fuel pumps in the car sector, I expected to make rapid progress. Well, the friends from the land of the rising sun did not plan to repair the pump and prevent the membrane from being removed. But something like that excites even more and since I was horrified to find that the diaphragm of the pump is cracked and hardened, a solution had to be found. In 2008 an user described the project in an old threat here in ngw. So get to work and document the whole work.
The fuel pump is quickly expanded.

The five M5 screws are also loosened quickly and the interior with the two check valves is revealed.

Since the membrane was riveted with the plunger, I carefully sanded the riveted head. Always in mind that Honda will call the proud sum of 170 euros for a new pump if the worst comes to the worst.

continue to grind gently until the upper membrane disc comes off

Then I had to loosen the lower membrane disc with the screwdriver. Always make sure that the pane is not bent. Otherwise it can happen that the pump does not become tight.

a spring and seal emerged below the plate. The seal ensures that gasoline does not get into the oil circuit if the membrane leaks.

here I have laid out all the parts in order on a board. I was afraid that I would no longer be able to put the pump together.

Since I can no longer rivet the pushrod, another solution has to be found. So I decided to close the whole thing with a small screw. The diameter of the push rod is 4.5mm and so an M3 screw should serve. This was still in my possession somewhere. I just had to find the little box with the screw.
Since the push rod was not stuck in the pump, I had to fix it to drill the 2.5mm hole. So I made a precise holding template.

Since the push rod also rotated after drilling, I found help in a pair of crimping pliers, which I recently bought from a cheap hardware store.

I mastered the hole without the drill piercing the push rod and remaining intact. Then replace the drill with an M3 tap and cut a thread into the rod.

Since I could not find a repair kit or a suitable membrane in the vastness of the Internet, I had to rethink. I finally found a gasket for the gasoline pumps of a Russian car called Wolga.
the material has the same thickness as the original membrane and is also fabric reinforced.

Using the old membrane, I then recorded the new membrane on the sealing material and punched the 5 mm holes for the screws with the punch pliers. Cut out the membrane with scissors.

The whole thing is now secured with the small M3 screw from the box after I dripped a drop of Loctite into the threaded hole.

After I reassembled the pump, I was able to check whether the pump was working again. Without further ado put the nozzle for the gasoline inlet into my mouth and actuated the pump several times. A vacuum immediately built up.
I am confident that the pump will pump petrol again.
And to support the pump, an electric pump is installed, but it only runs when the oil pressure light is on. I.e. when the engine is not running and the carburetors are already filled properly.
And then I worked on the next step ... the crankcase ventilation has to go somewhere. I recently found a nice accessory in a travel souvenir shop on the North Sea. Without further ado I decided that this would be the new container for the crankcase ventilation.
Here is a picture of the accessory:

in english: I am a woman and what are your super powers
I'm curious to see how it goes with the Uschi ... well, somehow she should be out on the street
Greetings
Harald
this week I screwed something on Uschi again. Inspired by an inquiry in the German Goldwing forum on how to repair the fuel pump, I wanted to briefly document the replacement of the membrane. Since I had already renewed a few fuel pumps in the car sector, I expected to make rapid progress. Well, the friends from the land of the rising sun did not plan to repair the pump and prevent the membrane from being removed. But something like that excites even more and since I was horrified to find that the diaphragm of the pump is cracked and hardened, a solution had to be found. In 2008 an user described the project in an old threat here in ngw. So get to work and document the whole work.
The fuel pump is quickly expanded.
The five M5 screws are also loosened quickly and the interior with the two check valves is revealed.
Since the membrane was riveted with the plunger, I carefully sanded the riveted head. Always in mind that Honda will call the proud sum of 170 euros for a new pump if the worst comes to the worst.
continue to grind gently until the upper membrane disc comes off
Then I had to loosen the lower membrane disc with the screwdriver. Always make sure that the pane is not bent. Otherwise it can happen that the pump does not become tight.
a spring and seal emerged below the plate. The seal ensures that gasoline does not get into the oil circuit if the membrane leaks.
here I have laid out all the parts in order on a board. I was afraid that I would no longer be able to put the pump together.
Since I can no longer rivet the pushrod, another solution has to be found. So I decided to close the whole thing with a small screw. The diameter of the push rod is 4.5mm and so an M3 screw should serve. This was still in my possession somewhere. I just had to find the little box with the screw.
Since the push rod was not stuck in the pump, I had to fix it to drill the 2.5mm hole. So I made a precise holding template.
Since the push rod also rotated after drilling, I found help in a pair of crimping pliers, which I recently bought from a cheap hardware store.
I mastered the hole without the drill piercing the push rod and remaining intact. Then replace the drill with an M3 tap and cut a thread into the rod.
Since I could not find a repair kit or a suitable membrane in the vastness of the Internet, I had to rethink. I finally found a gasket for the gasoline pumps of a Russian car called Wolga.
the material has the same thickness as the original membrane and is also fabric reinforced.
Using the old membrane, I then recorded the new membrane on the sealing material and punched the 5 mm holes for the screws with the punch pliers. Cut out the membrane with scissors.
The whole thing is now secured with the small M3 screw from the box after I dripped a drop of Loctite into the threaded hole.
After I reassembled the pump, I was able to check whether the pump was working again. Without further ado put the nozzle for the gasoline inlet into my mouth and actuated the pump several times. A vacuum immediately built up.
I am confident that the pump will pump petrol again.
And to support the pump, an electric pump is installed, but it only runs when the oil pressure light is on. I.e. when the engine is not running and the carburetors are already filled properly.
And then I worked on the next step ... the crankcase ventilation has to go somewhere. I recently found a nice accessory in a travel souvenir shop on the North Sea. Without further ado I decided that this would be the new container for the crankcase ventilation.
Here is a picture of the accessory:
in english: I am a woman and what are your super powers
I'm curious to see how it goes with the Uschi ... well, somehow she should be out on the street
Greetings
Harald
-
sgwilly

- Gold Member

- Posts: 1030
- Joined: Thu Apr 26, 2007 6:43 pm
- Location: Clayton, NC
Re: Building a café racer called „Uschi“
Well done.
Steve
'09 Yamaha FJR1300AE
'99 Valkyrie Tourer
'89 Isuzu Trooper 3.4L
'83 GL1100 MonkeyWing (on IR)
'75 GL1000 (in the queue)
'70 Suzuki T500 Titan (in the queue)
'64 MGB
IBA #58082
All my stuff is old. It makes me feel young.
SGWilly Gallery
'09 Yamaha FJR1300AE
'99 Valkyrie Tourer
'89 Isuzu Trooper 3.4L
'83 GL1100 MonkeyWing (on IR)
'75 GL1000 (in the queue)
'70 Suzuki T500 Titan (in the queue)
'64 MGB
IBA #58082
All my stuff is old. It makes me feel young.
SGWilly Gallery
-
CYBORG
- Moderator

- Posts: 24552
- Joined: Mon Jan 14, 2008 12:52 pm
- Location: Muskegon mich
Re: Building a café racer called „Uschi“
VERY well done 
1978 custom GL1000
1977 custom with 1200 engine
1985 gl1200
1977 custom with 1200 engine
1985 gl1200
-
LastMohawk
- Billet Alum. Member
- Posts: 237
- Joined: Fri Jun 07, 2013 7:57 am
- Location: Eifel, Germany
- Contact:
Re: Building a café racer called „Uschi“
Thank you,
In retrospect, I considered that I could simplify the step with the centering for drilling.
After I have sanded the rivet just so far that the upper diaphragm plate is still held, but the push rod is flat, you can use the old diaphragm as a centering. Fix it with the 5 screws without the top. Then on the one hand the push rod cannot turn and on the other hand it is vertical.
This makes drilling and tapping much easier.
After tapping, grind off the rest and remove the membrane with its upper plate. The lower plate can then remain in place.
Just replace the membrane and reassemble everything and fix it with a small screw.
Greetings
Harald
-
LastMohawk
- Billet Alum. Member
- Posts: 237
- Joined: Fri Jun 07, 2013 7:57 am
- Location: Eifel, Germany
- Contact:
Re: Building a café racer called „Uschi“
Hello,
once again made a little further on at GL. I didn't like the pressure point of the front brake at all. Back then I got the radial brake pump of a Suzuki 600/650 GSXR. But it is probably too small for the two 30 mm floating saddles. I only got the pressure point just before the handlebars. That was too dangerous for me, no reserve. So I got a radial pump from a Triumph Daytona. It has a 19mm piston and now it's much better.
In the back I have the brake cylinder of a Yamaha R1 in there. It fits and it also has a good pressure point, as it has to be.
Then the brake light wired and checked. And finally the fat starter cable soldered to the cable lugs and laid.
Last but not least, I wanted to see how it can be seen in the fresh air. It's better if you can take a few steps away and look at the result. Well, now that it brakes and then a rear wheel is inside. So get off the stage and out into the courtyard.
The view from the right:
and the right engine side. The hip flask will be used as an oil collection container for the crankcase ventilation.
and also the massive engine seen from close up on the left.
and my old beemer also wanted to pose a bit and was part of the picture
Next up. To set up the exhaust and then to attach it. I'll add the original one simply because I like it and it has a nice sound. Then get the ignition ready. Yes, then nothing should stand in the way of reviving the machine. If it works and everything fits, it will get new tires and, hopefully, the approval of the registration authorities.
Greetings
Harald
once again made a little further on at GL. I didn't like the pressure point of the front brake at all. Back then I got the radial brake pump of a Suzuki 600/650 GSXR. But it is probably too small for the two 30 mm floating saddles. I only got the pressure point just before the handlebars. That was too dangerous for me, no reserve. So I got a radial pump from a Triumph Daytona. It has a 19mm piston and now it's much better.
- bremse_vorne.jpg (82.76 KiB) Viewed 999 times
Then the brake light wired and checked. And finally the fat starter cable soldered to the cable lugs and laid.
Last but not least, I wanted to see how it can be seen in the fresh air. It's better if you can take a few steps away and look at the result. Well, now that it brakes and then a rear wheel is inside. So get off the stage and out into the courtyard.
The view from the right:
- seite_re.jpg (100.72 KiB) Viewed 999 times
- motor_re.jpg (110 KiB) Viewed 999 times
- motor_li.jpg (98.49 KiB) Viewed 999 times
- beide_seite_hi.jpg (108.9 KiB) Viewed 999 times
Greetings
Harald
-
Rat

- Photo Gallery Admin

- Posts: 15478
- Joined: Fri Oct 21, 2005 9:59 pm
- My Album: https://www.ngwclub.com/gallery/v/wingmans/rat/
- RIP: cookie
- Location: Toronto .... Canada
Re: Building a café racer called „Uschi“
Nice work ... tricky making all those 'off brand' bits work for you ...
Gord 
Gord
"I'd rather Ride than Shine"
‘14 KLR650 ... not a rat ... yet
‘84 GL1200i ‘R2B6' (Rat to Be 6, the last, adopted by twowings)
My Original 'RAT' was a hybrid '82 CB900/1100F
‘14 KLR650 ... not a rat ... yet
‘84 GL1200i ‘R2B6' (Rat to Be 6, the last, adopted by twowings)
My Original 'RAT' was a hybrid '82 CB900/1100F
-
ericheath
- Honored Life Member

- Posts: 9581
- Joined: Wed Jul 29, 2009 11:20 am
- Location: Winnipeg, Manituba
Re: Building a café racer called „Uschi“
Nice indeed! I enjoy your posts. Thanks for sharing.
Whatever I suggest here should be given ample time for a moderator to delicately correct. I apologize in advance.
77 WING, 1200 engine with 77 heads, cams, gl1100 foot pegs, Magna V65 front end, 764A carbs, [-gone Suzuki M109 monoshock--, replaced with gl1100 shocks] gl 1200 swing arm, gl1500 final drive, wheel and rear brakes Valkyrie seat, Meanstreak tank, Sportster pipes, Power Arc ignition off crank.
77 Wing. black
83 Wing, in pieces
"Continuing education is important even if the subject matter is fairly useless (as in this case)."---Greg Foresi
-
sunnbobb

- Facebook Admin

- Posts: 21272
- Joined: Thu Jan 10, 2008 4:09 pm
- My Album: http://www.ngwclub.com/gallery/v/wingmans/sunnbobb/
- Location: LaConner, WA
Re: Building a café racer called „Uschi“
Finally catching up on this thread. The stunt clutch is a very cool idea! Thanks for sharing.
I found the end of the internet
---- Bradshaw Bikes custom polishing for your wing. Visit us on facebook!
1978 Learning Experience
1980 County Road Hauler "Brain Damage"
1978 Cafe Custom Gl1000 "Vyper"
1977 Bulldog Inspired "Vaincre"
1981 Street Fighter GL1100 "No Quarter"
1983 Supercharged Street Drag "Anubis" (in worx)
1983 gl1100 mint restoration "Kristen"
1985 Aspencade..pondering.
-
Fred Camper

- Vice President

- Posts: 6912
- Joined: Wed Aug 12, 2009 9:38 pm
- My Album: http://www.ngwclub.com/gallery/v/wingmans/Jeff+Bozeman/
- Location: Metro Detroit
- Contact:
Re: Building a café racer called „Uschi“
Let us know if the clutch linkage effort turns out after riding her this season. That is an idea many of us would like to consider. And great progress and patience getting her this close to riding. Looking forward to seeing the exhaust fitted.
Proud member of the NGW Cartel (Rochester MI)
1977 GL1000 BADDOG (April 2012 BOTM)
1976 LTD - '993 LTD...and so it begins'
You should remember that it's peace of mind you're after and not just fixing the machine. R.Pirsig
1977 GL1000 BADDOG (April 2012 BOTM)
1976 LTD - '993 LTD...and so it begins'
You should remember that it's peace of mind you're after and not just fixing the machine. R.Pirsig
-
desertrefugee

- SUPER BIKER!!!!

- Posts: 3947
- Joined: Fri Nov 11, 2011 9:33 pm
- Location: Chandler, AZ, USA
Re: Building a café racer called „Uschi“
I also enjoy following Harald's experimentation and Uschi's evolution.
Lots of neat ideas and implementations over the years. I love the drilled rotors. I love how spotlessly clean the machine is. I love the paint and textures. A lot to love on this motorcycle. She gives what she gets.
Lots of neat ideas and implementations over the years. I love the drilled rotors. I love how spotlessly clean the machine is. I love the paint and textures. A lot to love on this motorcycle. She gives what she gets.
- Life is not about waiting for the storms to pass. It's about learning to ride in the rain.
-
CrazyJerry

- Titanium Member

- Posts: 338
- Joined: Sun Aug 19, 2018 7:09 pm
Re: Building a café racer called „Uschi“
Love the paintwork on this!
Great job!!!
-
~CrazyJerry~
Great job!!!
-
~CrazyJerry~
-
Easter

- True Blue Steel Biker

- Posts: 2999
- Joined: Thu Sep 13, 2012 11:33 am
- Location: South of Houston 100 miles
Re: Building a café racer called „Uschi“
Looking sharp, nice work.
Bikes at present:
83 XL 600r with a 2004 XR650L engine
And a slightly worse for the wear BMW GS adventure bike awaiting repair
83 GL in process
83 XL 600r with a 2004 XR650L engine
And a slightly worse for the wear BMW GS adventure bike awaiting repair
83 GL in process
-
5speed
- Honored Life Member
- Posts: 5315
- Joined: Sat Jul 11, 2015 2:37 pm
- Location: Nova Scotia Canada
Re: Building a café racer called „Uschi“
beautiful wing
1982 1100 standard. (sold)
1986 Yamaha FJ1200
2000 Yamaha Roadstar
1976 GoldWing. running but not on the road
1978 Goldwing. future cafe project.
2019 Can-Am ryker (boss's new ride)
2002 Shadow American Classic(sold)
1983 Shadow 500. (sold)
1986 Yamaha FJ1200
2000 Yamaha Roadstar
1976 GoldWing. running but not on the road
1978 Goldwing. future cafe project.
2019 Can-Am ryker (boss's new ride)
2002 Shadow American Classic(sold)
1983 Shadow 500. (sold)
-
- Similar Topics
- Replies
- Views
- Last post
-
- 11 Replies
- 656 Views
-
Last post by Gowing
-
- 10 Replies
- 1665 Views
-
Last post by sunnbobb
-
- 5 Replies
- 768 Views
-
Last post by rcmatt007
-
- 20 Replies
- 3001 Views
-
Last post by ianstaley
-
- 1 Replies
- 677 Views
-
Last post by Sidecar Bob